Of sewing challenges and photo shoots

Summer is around the corner, and with all things bright and beautiful come a deluge of sewing challenges.

indie pattern

I’ve been a long time lurker on The Monthly Stitch. No better reason to fully embrace this wonderful sewing group by participating in #indiepatternmonth! I chose to enter the PDF sewing pattern swop, and in the round robin swop, got sent the lovely Jenna cardi from Muse Patterns while picking the Bonnell dress from Dixie DIY Patterns. I am super excited about this challenge. It never crossed my mind to sew a cardigan before, even though i’m in one practically every day. At first I thought it would be too warm to sew for June, but then the fabric suggestions included stretch lace. And why not!?

The great thing about choosing the PDF swop instead of hard-copy swop, is that it gives you access not only to the one you got sent, but also the one you buy for your swop partner. So once I’m done with the Jenna cardi, I’ll be getting down to the Bonnell dress.

sewing_challenge_home_1

And then there’s the annual #Simplicity sewing challenge! I soooo wanted to do tihis challenge last year but got caught up in packing and packing more boxes for our big move. As a measure of how excited I am about this, I’ve applied for TWO patterns. The vintage make and the childrenswear.

It’s been a busy month for me, meeting and speaking to the lovely Sara from Rocking Horse Photography. My Etsy shop is up and running, but has rather slapdash photos courtesy of yours truly. When Elaine from Celebrate With Love got in touch with me about stocking some of my clothes on her website, I knew I had to have much better photos or risk my stuff look like rag wear. So I’m off tomorrow to do the still shots at a park in Canary Wharf. The sun promises to be up and shining tomorrow, and hopefully the photos will capture the heart and soul of what baby clothes are all about. God help us trying to get G (and others) to pose nicely next month for the model shots.

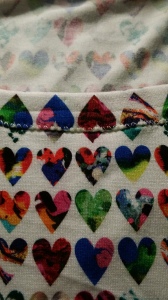
The #SewingBee is back on our TV screens! This week was children’s week and I got such a kick out of seeing this Liberty fabric in the studio haberdashery!

Liberty Hearts

Just to say that it can make a beautiful romper, but perhaps in this bodysuit pattern style rather than the #sewingbee’s babygro pattern which has a fiddly gusset. Now imagine pattern matching that!!
 

The Agnes Top by Tilly and the Buttons!

Agnes Top

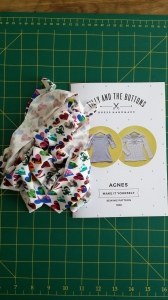
I sew a lot of jersey for my toddler but was still worried about embarking on the Agnes top by Tilly and the Buttons. Not least because of handling a lot more notoriously stretchy (and sometimes slippery) Jersey fabric, but also because I decided to splurge on an adorably beautiful jersey fabric from Liberty!

Agnes Top 2

It all began when I decided to head out to central London on a whim. It was a beautifully sunny morning and perfect for catching the clipper to enjoy the sights from the river. Bonus points for entertaining a toddler too when you can sing “London Bridge” while pointing out the actual bridge. It drizzled at one point and I decided to nip into  Liberty for some cover.

20160415_145016.jpg

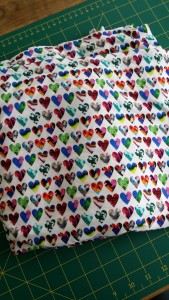
It’s easy enough to find jersey fabric, but the range tends to be either plain, or in stripes or polka dots design. So when I chanced upon this vibrant Marble Hearts dufour jersey, I had to have it and the Agnes Top immediately came to mind espeicially as it’s become such an indie cult classic in the sewing world.

20160415_153224.jpg

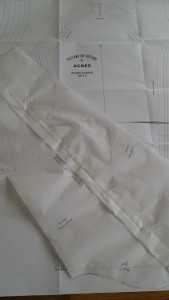
The great thing about indie patterns is that instructions are just so straightforward and easy to follow. It was also such a delight to have a little booklet pop out instead of an A3 instruction sheet to open out and find the space to read and absorb.

20160415_124019.jpg

I decided to do the long sleeved version without the ruching. I wanted something quick and easy, as I was rather nervous about ruining more than 30 GBP worth of fabric!

20160415_145737.jpg

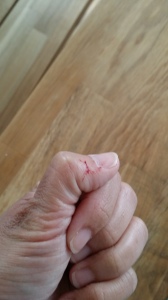
I had a little accident during the cutting, but oh well, no pain no gain.

20160415_153234.jpg

The pattern calls for a stabilizer for the back shoulder seams, which was easily done with a ribbon.

20160415_165120.jpg

And then it’s straightforward stitching back shoulder seams to front seams.

20160415_170820.jpg

A little tricky inserting the neckline, but nothing too complex.

20160415_174342.jpg20160415_214013.jpg

Once done, it’s down to serging the side seams and sleeve seams, hemming, and then trying it on.

Agnes Top 4

I am extremely pleased with my top. It fit perfectly and is so very, very comfortable. I did this top in a day, as I was a bundle of excited nerves and there is nothing like that sort of sewing Adrenalin to keep you going.

Agnes Top 3

I will definitely be making this top again. The pattern is drafted to end at the hips, and this is perfect for a mum on the run who needs to sit on the floor at playgroups and doesn’t want her bits and pieces poking out. It also allows unrestricted movement of your arms, and this is crucial for running about and picking up an energetic toddler. A fabulous pattern from Tilly and the Buttons!

You can also read about a sewing hack from Lauren Guthrie of Guthrie and Ghani.  In this tutorial, Lauren shows how to adapt the pattern into a maternity top.

Agnes Top

I look forward to sewing the ruched sleeve version next to welcome summer. Perhaps with another fun print!

GBSB 3 Hour Slouchy Cardigan, Done and Dusted!

20160321_143427.jpg

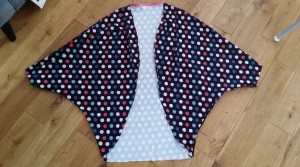
It is finished! As we move into Spring in London, I thought I’d better get down to finishing the 3 hour slouchy cardi from the GBSB Fashion with Fabric book.

20160321_143405.jpg

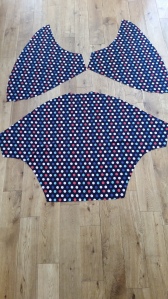
I used Jersey to sew this up with a stretch needle. The longest part of this project, so to speak, was tracing the pattern out from the pattern pack.

20160309_144202.jpg

I’ve always found tracing patterns really tedious and almost gave up as a result. But I had blogged about doing this earlier and so got down to it.

20160310_092305.jpg20160311_133747.jpg

Once done, everything came together quite easily. It’s a ‘forgiving’ pattern so even if the cutting was’nt perfect at some points, it didn’t really make a difference when sewing it together.

20160320_152300.jpg

I used a zig zag stitch with black thread for the shoulders and side seams.

20160321_142753.jpg

The shoulder pleats were done with a straight stitch. I know the pattern calls for a twin needle to be used for this on aesthetic grounds but I thought a single stretch needle would be equally effective.

20160321_142738.jpg

And there we are!

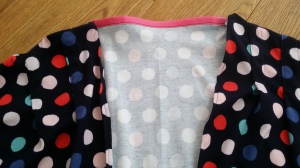
The only changes I made to the pattern was to use bias binding for the back neckline. The pattern called for interfacing to stabilise this but I thought bias binding would work better as I had some polyester pink binding on hand. As polyester is lighter than cotten it helps stabilise the jersey while not dragging it down as cotton bias binding would.

20160321_142804.jpg

Final thoughts on this pattern? It’s very easy to sew but I’m just not really convinced jersey fabric is the way to go for this one as it seems ‘over-drapey” (if there is such a word!). Something done with fleece, for example, provides a little bit more shape to this but yet maintains the integrity of the original pattern. Still, I look forward to using this when out on our terrace playing with my son this Spring.

Making the 3 Hour Slouchy Cardi

Where has the time gone!?

I’ve still been sewing but just never found the time to write about it, reason being that my baby suddenly exploded into a boisterous toddler all of a sudden. These days I can’t even sit and type on my laptop as he’ll run over and want to sit on my lap and play with the mouse. He is having his nap now so I thought I’d better get round to my blog.

I’ve been sewing mostly children’s clothes over the last few months for the simply reason that it’s easier to trace the patterns (only one sheet usually required) and much faster too. I’ve mostly made jersey t-shirts for G with fun prints like the one below.


G in shirt

I also do some personalisation on onesies in the odd moment or two when my hands feel itchy but not itchy enough to put something together 🙂

G

And to get me off to a good sewing start in 2016 I’ve picked the 3 hour slouchy cardigan from the Great British Sewing Bee: Fashion with Fabric book.I’m quite excited about this one as spring is around the corner (although the papers say snow is too!).

cardi project

I’m sufficiently confident these days about sewing with jersey so I’m quite excited to be making this project! Now to trace the pattern out 🙂

Autumn (mis)Adventures

Autumn in London is always a curious experience especially when you’ve experienced the colorful canopy of red and gold leaves cascading everywhere in other parts of the world. Predictably, it is a wet and cold day today and I’m waiting for the bubs to wake up before taking him for a stay and play session. We have had a busy schedule this September without even meaning to. I suppose its part and parcel of integrating with local community life and being inevitably drawn into the rounds of mums and bubs sessions.

My sewing has been much like Autumn in London. Rather unpredictable, indifferent, and at times, dispassionate. I blame it on spending too much time ogling at Tamal on the Bake Off…

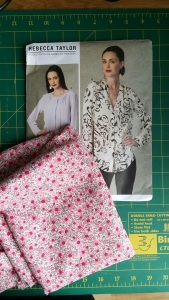
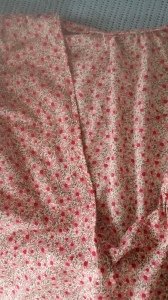
I started and then stopped sewing this Vogue pattern for a long sleeved shirt and now regret the waste of a pretty cotton lawn fabric.

wpid-20150810_170310.jpg

I suppose this happens when you try to take shortcuts and leave out interfacing which was what happened. I was a little too lazy to interface the neckline and while it turned out okay-ish without it, the hemming was rather awful to look at and barked “HOMEMADE” rather than “handmade” if you know what I mean (see pic below).

wpid-20150904_122753.jpg

Setting in the sleeves was similarly a ‘meh’ experience with too much bunching on one side.

wpid-20150904_122800.jpg

By the time I got to cutting it through the front to sew buttons I was ready to trash this project….

wpid-20150904_122736.jpg

I know, I know…its a great waste of fabric and truth be told, it’s a lovely comfortable cotton lawn that looks great with jeans and is just right for this autumn weather. I got as far as sewing buttons on, but then realised that I needed to sew in another button right on top and was just too demotivated to switch the presser foot again. So the blouse is currently on the backburner and folded away in my sewing cupboard to take up again on another day where hopefully flashes of sewing brilliance will inspire me with it.

For now, I’ve returned to my comfort zone of sewing for my son. I managed to squeeze in a long sleeved envelope neckline shirt for the bubs and here he is with it looking like he’s pole dancing 🙂

wpid-20150916_085317.jpg

Onesies

A quick browse through Etsy will show that many shops sells customised onesies but few actually sell onesies sewn from scratch.

image

Dont ask me why but the idea of sewing your own bubba a onesie from scratch appeals 120% to me. Yes it involves knit fabric. Yes it involves snapping on fiddly poppers. But knit fabric and poppers are just really so much easier when it’s for someone who weighs less than 10kg 😇

What I used

I know there are quite a few PDF patterns that you can download on the internet to sew up a baby onesie. The one I contemplated using was by Shwin and Shwin  but in the end I decided on Simplicity 2291 as I wanted the flexibility to sew a long-sleeved onesie for the bubs. Nonetheless, Shwin and Shwin’s webpage is a really good tutorial/pictorial on how to put together a onesie which is pretty invaluable. Plus what an adorable baby to look at as well! 🙂

I used knit fabric for all three versions I sewed from Spotlight. You need about half a metre for a onesie, and this includes bias binding if you choose to make it yourself. Also, poppers, as well as matching or contrasting threads.

Sewing the Onesie up 

Simplicity’s pattern is a teeny unconventional insofar that it doesnt have an envelope neckline, but rather 2 poppers each on both shoulders. This can be quite tricky because quite frankly, there isn’t much time to measure equidistance between poppers when you’re looking after a teething baby 😉

image

Version 1 was a fun doggy print. In this version, I made my own bias binding and used white thread. The pattern instructions are pretty clear and I had no real issues with it at all. My seam allowance was clearly over-generous but heck, babies grow!

image

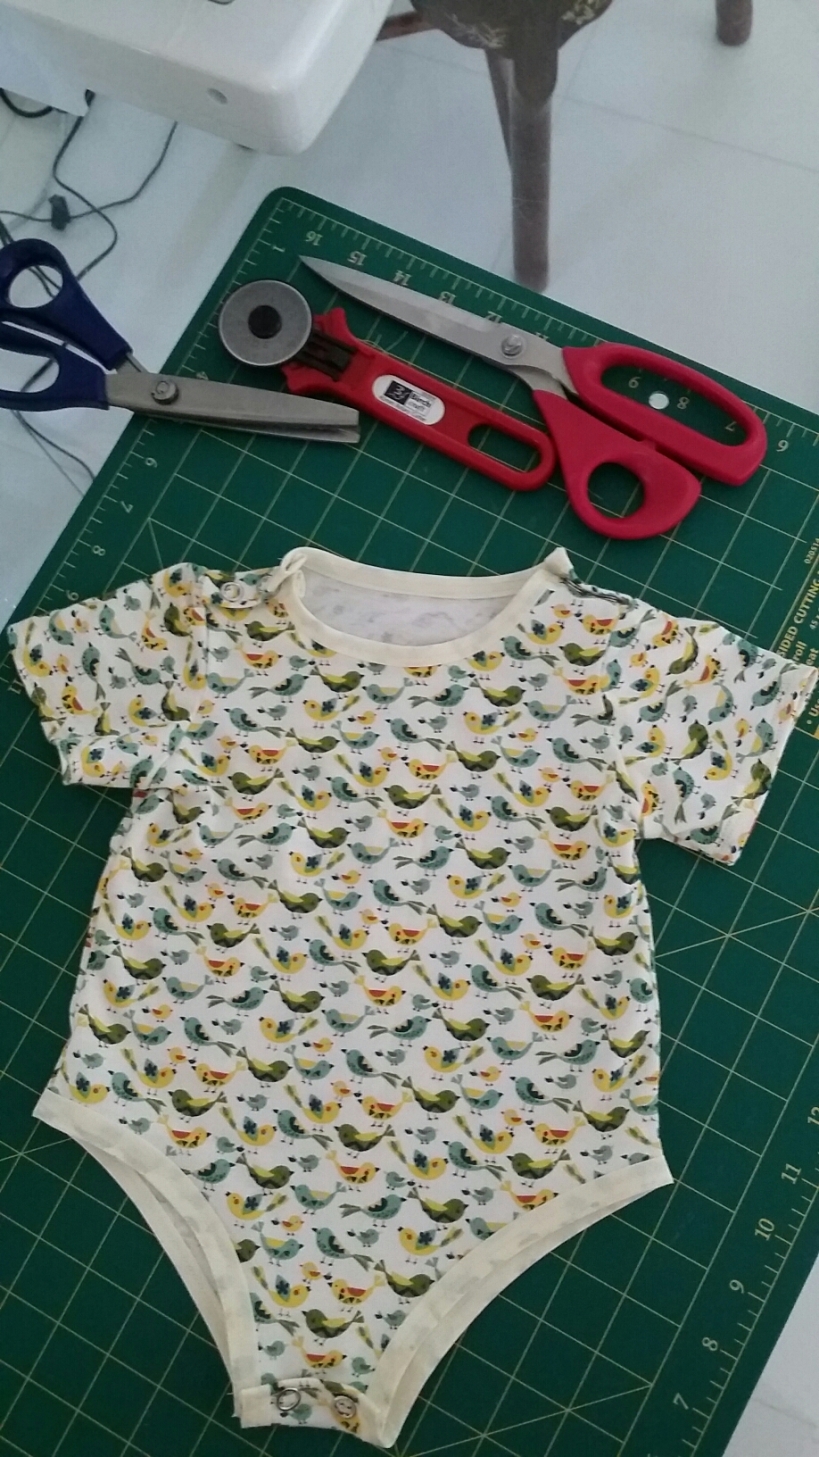
Version 2 was a really sweet bird themed knit print. In this version, I hacked off the sleeves to make it short as its much better suited to tropical weather.

image

Word about the poppers, you need to source for small poppers otherwise they take up too much space. Also, put in the poppers AFTER you sew the bias binding on the neckline and set in the sleeves. Otherwise, it’s a really tight squeeze as you have to maneuver around them.

image

In Version 3  I decided to play around with the poppers! I thought, since they are so fiddly, why not just use one big popper per shoulder instead?

image

This was the least successful 😂

image

As you can see from the pic one big popper doesnt do the trick.

image

It just didnt sit flat at bubba’s shoulders and makes a rather messy neckline. I also had some serious haywire sewing on the bias bindings!

image

The bubba was a good sport about it, however ☺

Sewlosophism

Sewing a onesie entirely from scratch may seem daunting. The commercial world will try to convince you, that there is no point reinventing the wheel when thousands of factories churn out thousands of onesies every day. Why not just customise a onesie with appliques? Indeed I have (my next post! :)), and customisations can be really fun and cute. But there is nothing quite like sewing something 100% handmade for your nearest and dearest, even if the poppers and bindings aren’t perfect and are somewhat of a mess.  Plus, you can go wild on fabric choices and really stand out from the baby crowd! 😉  Handmade clothes are always full of love, good tidings, and fond memories, even if it has the odd sewing mistake here and there 🙂

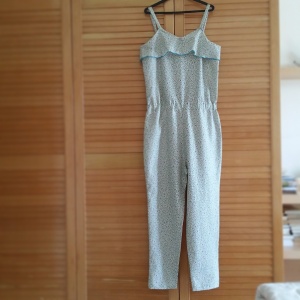
Jumping Into June with the Great British Sewing Bee Jumpsuit

Jumpsuits for June in the sewing world’s calendar and I jumped right into it after reading about it here. HandmadeChris promptly listed all who dared jump into this challenge and there was no ignoring it after the post! 🙂

wpid-wp-1433385043123.jpeg

So Wikipedia tells me that none other than Yves Saint Laurent invented the jumpsuit. I have never sewn a jumpsuit before but have had 2 in my closet after catching Samantha in a gorgeous flowy white jumpsuit in SATC. I like the jumpsuit for its comfort and wear-ability, and most of all for being able to accommodate and visually slim down my thunder thighs.

I chose the Great British Sewing Bee : Fashion with Fabric pattern. I must confess that Simplicity 1355 came very close in the pattern stakes but after considering the number of boxes left to pack I decided to go with the #GBSB pattern. I had also previously sewn the #GBSB camisole top and was curious to see it in jumpsuit form.

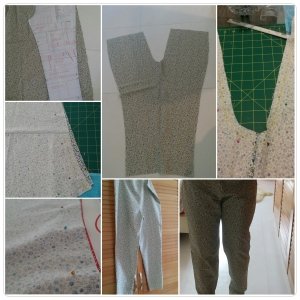
After toying with a red gingham fabric (yes what was I thinking!), I went with a cotton floral print. The process itself starts off with making the pants first and that was easily done within an evening.

wpid-wp-1433384455959.jpeg

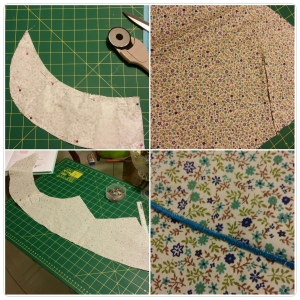
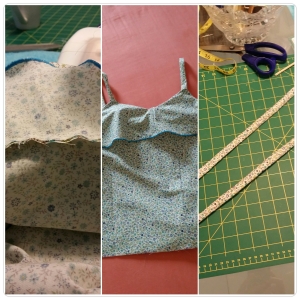
I did a couple of things differently with the top this time. A rolled hem instead of pin hemming for the frill.

wpid-wp-1433384599675.jpeg

I also skipped inserting a facing and sewed it directly on to the main body. Sorry! Facings can be such a pain and I didn’t think the fabric needed it :p

wpid-wp-1433384675516.jpeg

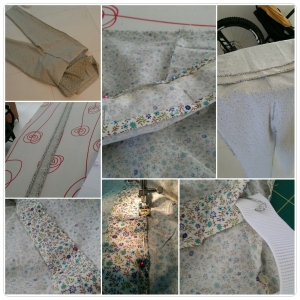
Finally, pants were joined to the camisole with bias binding and elastic.

wpid-wp-1433384789024.jpeg

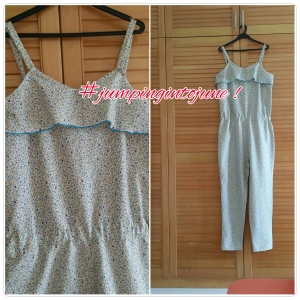
And voila! In its jumpsuit glory. Not quite the sort Mick Jagger prances dances around in, not quite the sort Lewis Hamilton crashes races around in, but just what it is, my very own #handmade jumpsuit!

wpid-img_20150603_141448.jpg

So what happened when I Jumped into June with this Jumpsuit?

wpid-2015-06-04-11.54.59.jpg.jpeg

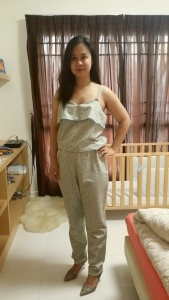
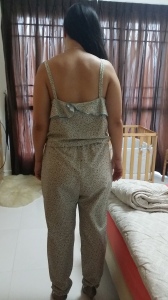
There was a huge amount of trepidation when it came down to the fitting crunch as this is a no-zip-no-button jumpsuit. But not too bad! The fit was essentially fine but I was too generous with the length of the straps and the frill was quite a disaster from the back as I didn’t match it properly.

wpid-20150604_114449.jpg

My favorite bit of this jumpsuit? The rolled hem in gorgeous blue thread that makes it so fun and flirty!

wpid-20150604_114215.jpg

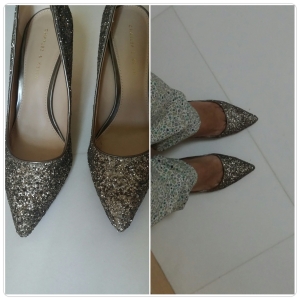
Paired with a nice silver glittery shoe and you have a perfect party outfit. I prefer jumpsuits with a wider flare at the ankles but I suppose the #GBSB pattern was drafted this way because of the various hacks you can sew off it. In all honesty, without a pair of heels this jumpsuit can look a little frumpy if you have a long torso with short legs like me!

wpid-wp-1433392809368.jpeg

And here we have Milo wanting to join in the camera fun together with Boop 🙂

wpid-20150604_114608.jpg

So there you have it, #jumpingintojune with all its fun and laughter. Here’s to a wonderful month ahead 🙂

Now what are we sewing for July!? 😉